
Introduction
This tutorial provides the best simplest possible solution to help the developers to understand the technical implementation of Hypi APIs in their Angular 10 application. The topic we will discuss here is a simple user management application. The user can perform some CRUD operations in the angular application using the Hypi APIs. It uses graphql.
The important technical points will be highlighted here along with the connectivity of the Angular application to the Hypi server-less application. It will also help the developers to get the idea of some of the useful APIs it provides. The developer can enhance the functionality using the basic core concepts discussed here.
The article will start with creating an account and creating an app and its corresponding release in Hypi. Then we will connect to its instance in our angular 10 application. After the connectivity, we will perform CRUD operations on the user.
Hypi Application Setup
Step 1: First, the developer will create an account on the Hypi website to create the server-less app. After doing so, the developer then creates an app by clicking on the button as shown in Figure 1. The user shown below has already created an app named user.
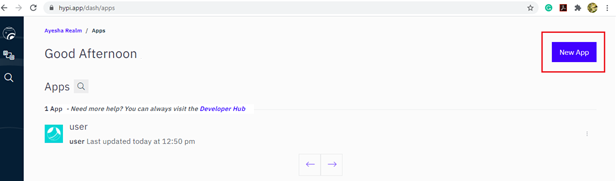
Figure 1
Step 2: In this step, the developer needs to create a release in the app. In this tutorial, we have created users-01 release. The user can create multiple releases based on the application requirements and enhancements. When the developer opens the release, the following page is opened having multiple tasks to perform. Here we will focus on the schema and the editor in which the developer uses the APIs of hypi to develop his or her app functionality.
Step 3: The schema of a release will contain customized logic of the app. The existing APIs of Hypi are already inherited in the users-01 release. In this tutorial, we will use the existing APIs provided by the Hypi. So in this case, our schema will contain no code at all.
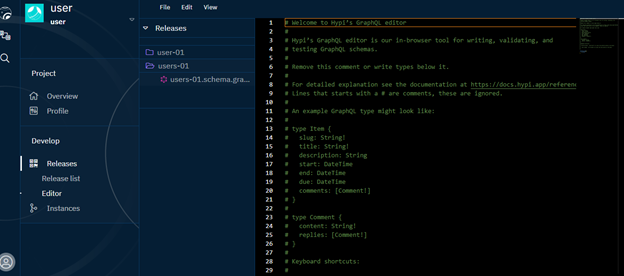
Figure 2
Step 4: After the release is created, we will create an instance of it. This instance will be connected to our angular application. We will provide a unique domain name to our instance. In our tutorial, we have created an instance with domain name users-07-hypi.com.
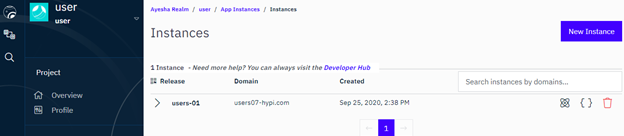
Figure 3
Angular 10 application
Step 5: In our angular 10 app, we will create a user interface from where we will send the request to create and find a user. We will use the Hypi’s createAccount graphql to create a user. The angular app will send a POST request to the Hypi’s server. Let’s take a look at the technical details of connecting the angular app to the Hypi’s server.
In the angular app, we will first add the HttpClientModule in the app.module.ts along with the other imports necessary to run the app.
File: app.module.ts
import …
import …
import {HttpClientModule} from '@angular/common/http';


@NgModule({
  declarations: [
    …
  ],
  imports: [
    …,
    …,
    HttpClientModule
  ],
  providers: […],
  bootstrap: […]
})
export class AppModule { }
Step 6: Then we will make an injectable requests service, necessary to request API services from Hypi’s server.
File: requests.service.ts
import …
import {Injectable} from '@angular/core';
import {HttpResponse, HttpHeaders, HttpParams} from '@angular/common/http';
import {Observable} from 'rxjs';
import {map} from 'rxjs/operators';
import {HttpClient} from '@angular/common/http';
import {Router} from '@angular/router';
import …
@Injectable()
export class RequestsService {

  constructor(private http: HttpClient,
              private router: Router) {
  }
  postRequest() {
      var values: string;
      const headers = new HttpHeaders()
      .set('hypi-domain', 'users07-hypi.com')
      .set('Authorization', 'eyJhbGciOiJSUzI1NiJ9.eyJoeXBpLmluc3RhbmNlIjp7InJlYWxtIjoiYXllc2hhIiwibmFtZSI6InN0b3JlIiwicmVsZWFzZSI6ImxhdGVzdCJ9LCJoeXBpLmxvZ2luIjp0cnVlLCJoeXBpLnB1cnBvc2UiOiJsb2dpbiIsImh5cGkudXNlcm5hbWUiOiJheWVzaGE5MDA5QGdtYWlsLmNvbSIsImF1ZCI6ImF5ZXNoYSIsImlhdCI6MTYwMDkyMDY3NSwiZXhwIjoxNjAzNTEyNjc1LCJzdWIiOiIwMUVKR0VFREpUS1haMzhKMEo1RUQ5V1BNUiIsIm5iZiI6MTYwMDkyMDY3NX0.WxuWUK3-eCmHLmSibDQs441Yt-L6PW0Z3uQj4UOr49iLIVW0flBfAViPqqK1XZTAQCGpcbOCSazKwDmlotnyhTcoWhsbjOF9UbTtOvTJwr0WPwkKsrwLFXFMAAgyuWtaAkfhIDtWRM8OPHnY_MDQHCyfB5n-8YhtZWBkWn-WGPfXu9CCpJ-bE-fZ-tGSICmLjPCfxO4mGRC5bILc9C0C9lJ-wivA6Uo64ICLmEjn4dvX6et5OoniyYDVS9wYwCyJqQUh61oZRhY2hpPwwlQYp37D0Ek0HN4q4LJKkTL80qxvxL4XeO6kXHGO7L-W3xM_mI7IjlGHe_4jtchu2QPYXg')  .set('Content-Type', 'application/json')
      .set('Accept', 'application/json');

       ….

    });
  }
}
In the above code, we have made a postRequest function which will contain all the necessary code to make the POST request. There are two headers necessary to make a POST request to the Hypi’s server.
- hypi-domain: It will contain your instance domain name. In our case, it is users07-hypi.com
- Authorization: It is authorization token you will get from the Hypi website.
- Content-Type: The content type will be application/json.
- Accept: It will accept application/json format.
Step 7: Next, we have to make a payload to send to graphql. We will use Hypi’s Account object. The members we will discuss here will be username and password. A developer can use as many members of the Account object as needed.
The payload has mainly three parts, operation name, variables and query. The operation name will contain upsert, used to do insert or update. The variables will provide the dynamic values to be used in the graphql. In our case it is adam for username and secret12 for password. Please note that the password is a map member of the Account object in the Hypi’s API.
The payload is stored in a string variable values. To send in json form, we will use JSON.stringfy() method.
      // to create an account
      values = JSON.stringify( {operationName: 'upsert', variables: {value:
        { username: 'adam', password:
        {value: 'secret12'}} }, query: 'mutation upsert($value: AccountInput!) { createAccount(value: $value) {id}}' });
To call the API url, the following POST request will work to create the user.
      this.http.post('https://api.hypi.app/graphql', values , {headers})
      .pipe(map(data => { console.log(data); })).subscribe(result => {
}
In this request, we are calling https://api.hypi.app/graphql to execute graphql query. Next, we are passing the values variable and headers we created. The response from the API will be shown in data. We are showing it on the console using console.log().
Step 8: Next, to find a user account, we will use Hypi’s findAccount API. The following payload will do the trick, the rest of the part of POST request will remain the same.
values = JSON.stringify( {operationName: 'findAccount', query: 'query findAccount($arcql: String!){\n find (type: Account, arcql: $arcql){\n edges{\n node{\n ... on Account {\n username\n password{value} \n emails{value}\n }} cursor} pageInfo{hasPreviousPage \n hasNextPage \n startCursor \n endCursor \n pageLimit \n previousOffsets \n nextOffsets} } }', variables: {'arcql': "username='adam'"} });
In the above payload, the filter arcql is used to find the data based on username. Here we will filter the data based on username Adam.
The complete POST request will be as follows.
 postRequest() {
      var values: string;
      const headers = new HttpHeaders()
      .set('hypi-domain', 'users07-hypi.com')
      .set('Authorization', 'eyJhbGciOiJSUzI1NiJ9.eyJoeXBpLmluc3RhbmNlIjp7InJlYWxtIjoiYXllc2hhIiwibmFtZSI6InN0b3JlIiwicmVsZWFzZSI6ImxhdGVzdCJ9LCJoeXBpLmxvZ2luIjp0cnVlLCJoeXBpLnB1cnBvc2UiOiJsb2dpbiIsImh5cGkudXNlcm5hbWUiOiJheWVzaGE5MDA5QGdtYWlsLmNvbSIsImF1ZCI6ImF5ZXNoYSIsImlhdCI6MTYwMDkyMDY3NSwiZXhwIjoxNjAzNTEyNjc1LCJzdWIiOiIwMUVKR0VFREpUS1haMzhKMEo1RUQ5V1BNUiIsIm5iZiI6MTYwMDkyMDY3NX0.WxuWUK3-eCmHLmSibDQs441Yt-L6PW0Z3uQj4UOr49iLIVW0flBfAViPqqK1XZTAQCGpcbOCSazKwDmlotnyhTcoWhsbjOF9UbTtOvTJwr0WPwkKsrwLFXFMAAgyuWtaAkfhIDtWRM8OPHnY_MDQHCyfB5n-8YhtZWBkWn-WGPfXu9CCpJ-bE-fZ-tGSICmLjPCfxO4mGRC5bILc9C0C9lJ-wivA6Uo64ICLmEjn4dvX6et5OoniyYDVS9wYwCyJqQUh61oZRhY2hpPwwlQYp37D0Ek0HN4q4LJKkTL80qxvxL4XeO6kXHGO7L-W3xM_mI7IjlGHe_4jtchu2QPYXg')  .set('Content-Type', 'application/json')
      .set('Accept', 'application/json');

      values = JSON.stringify( {operationName: 'findAccount', query: 'query findAccount($arcql: String!){\n find (type: Account, arcql: $arcql){\n edges{\n node{\n ... on Account {\n username\n password{value} \n emails{value}\n }} cursor} pageInfo{hasPreviousPage \n hasNextPage \n startCursor \n endCursor \n pageLimit \n previousOffsets \n nextOffsets} } }', variables: {'arcql': "username='adam'"} });

      this.http.post('https://api.hypi.app/graphql', values , {headers})
      .pipe(map(data => { console.log(data); })).subscribe(result => {

    });
  }
The developer can inject the request in the required component and then he or she can use this POST function and show the response in the intended UI.
File: app.component.ts
import { Component } from '@angular/core';
import {RequestsService} from './requests.service';

@Component({
  selector: 'app-root',
  templateUrl: './app.component.html',
  styleUrls: ['./app.component.scss']
})
export class AppComponent {
  title = 'userapp';
  constructor(private requestService: RequestsService){

  }

  findAccount() {
  	this.requestService.postRequest();

  }
}
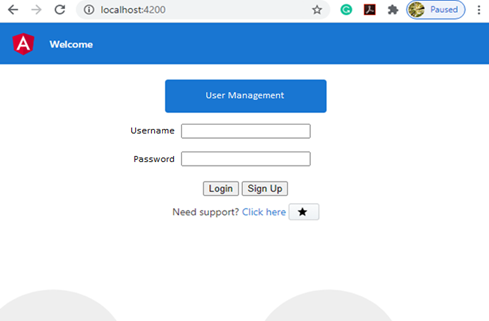
Figure 4
Conclusion
In this tutorial, we have discussed technical details about performing some operations on user using Hypi’s APIs. The concept revolves around using Hypi’s serverless app as back-end and the angular 10 application as front-end. Using Hypi’s createAccount and findAccount graphql APIs, we have successfully created and searched a user. We have used Account object already defined in Hypi. After successful Hypi account setup and app creation, we first connected to its instance and then we have used our intended graphql APIs to create and find a user.
The source code can be found at https://github.com/hypi-universe/docs/tree/master/examples/angular-intro-01/userapp


