

In this tutorial, we are going to build a React Native app that is integrated with a Hypi backend. The app will support both the React Native CLI as well as Expo CLI.
This React Native Hypi tutorial will show how to use Hypi platform as a backend.
You can also download the full source code from Github if you want to jump straight into the code.
Let’s see more details in the following sections:
- Creating an app in Hypi
- Creating a release on Hypi platform
- Creating a schema
- Creating an Instance for the release
- Inserting the records
- Creating & configuring a new React Native app
- API Setup on React Native app
- App Execution
1.Creating an app in Hypi
First let’s understand few concepts of Hypi.
- Hypi uses the concept of an App to encapsulate a collection of models, serverless functions and any resources they need to serve their purpose.
- An App can have data models written in GraphQL as well as other serverless functions. Think of an app as a way to group related behavior and resources
- An app on Hypi platform will further have
- Release (Schema,Dependencies,Fields)
- Instance (Instance domain, Data ,Monitoring/metrics,Logs)
For more information on these concepts please read here
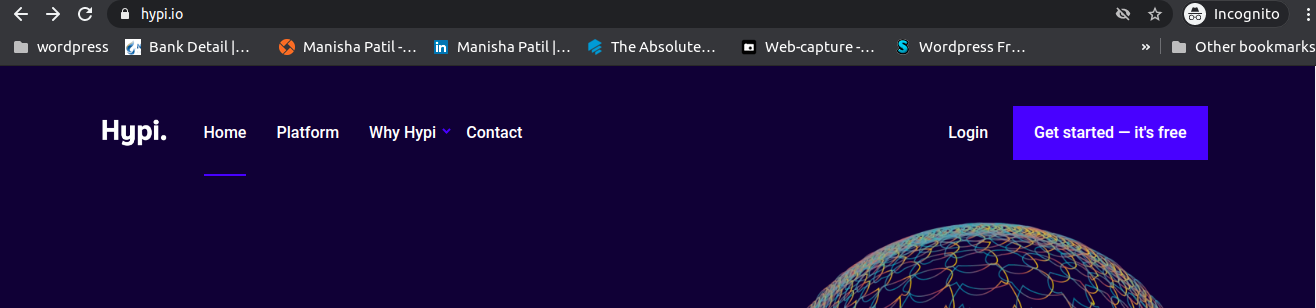
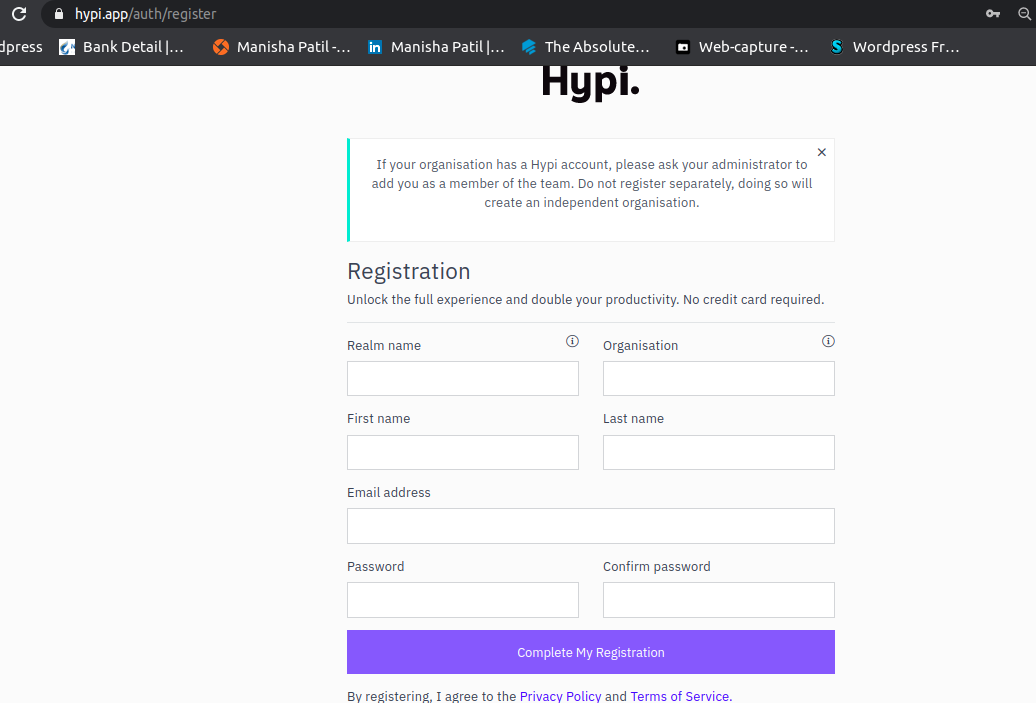
First let’s create an account on Hypi.
Goto https://hypi.app/. Next, click on button “Get Started – it’s free”
Complete all the required fields in the registration dialogue, click “Complete My Registration”
Login with the credentials, you will see the dashboard as show below:
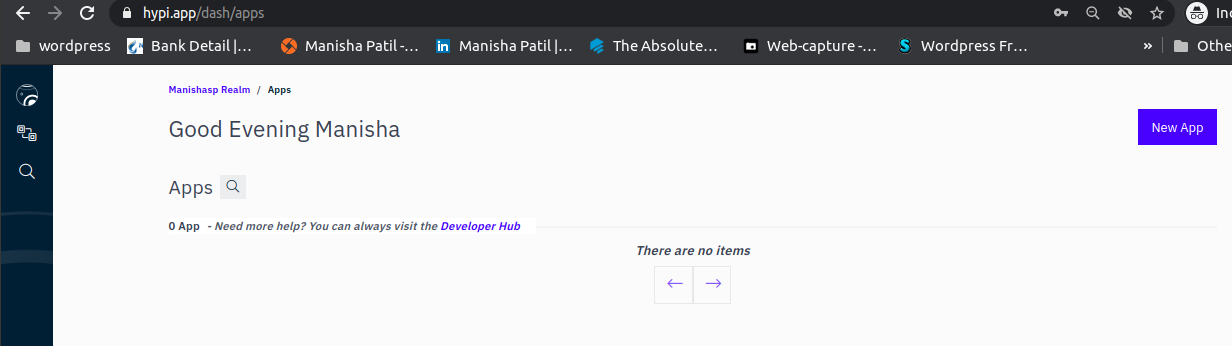
Click on New app button, a screen as below appears, fill out all the details and click on Create App

2. Creating a release on Hypi platform
Once the app is created, next, it takes to release creation as below:
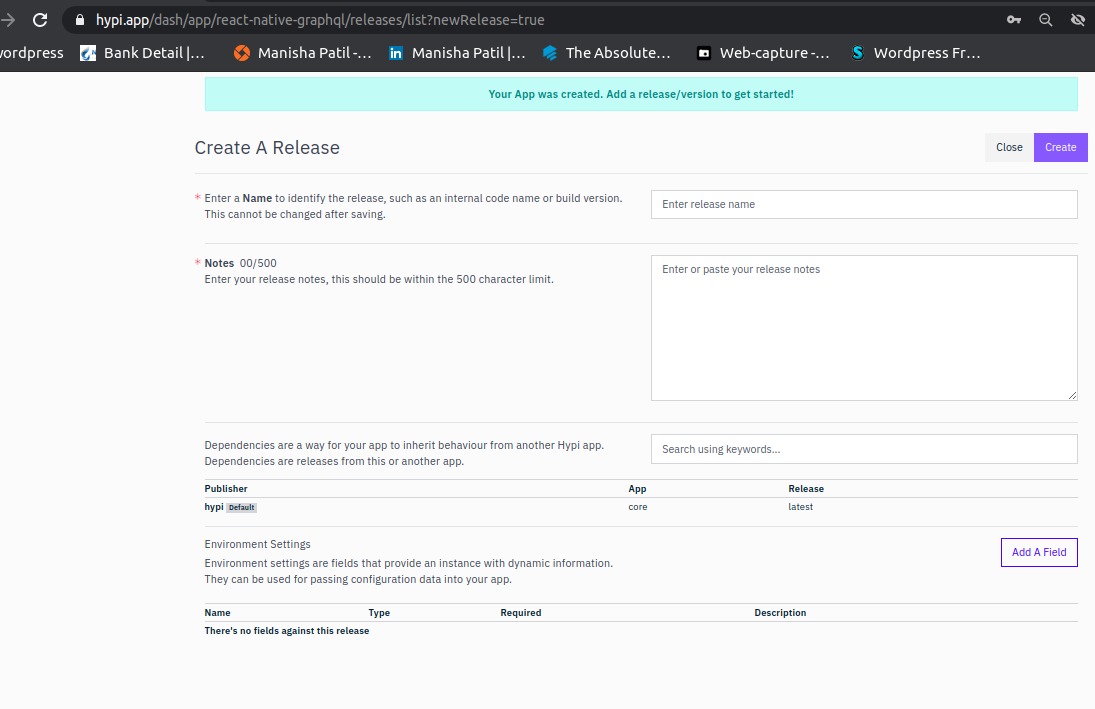
A release represents a version of your app. Each release can be used independently. For example you could create three releases for the same app called
alpha,rcandprod-1. The alpha release can be used for development, the rc release for release candidates and prod for production.
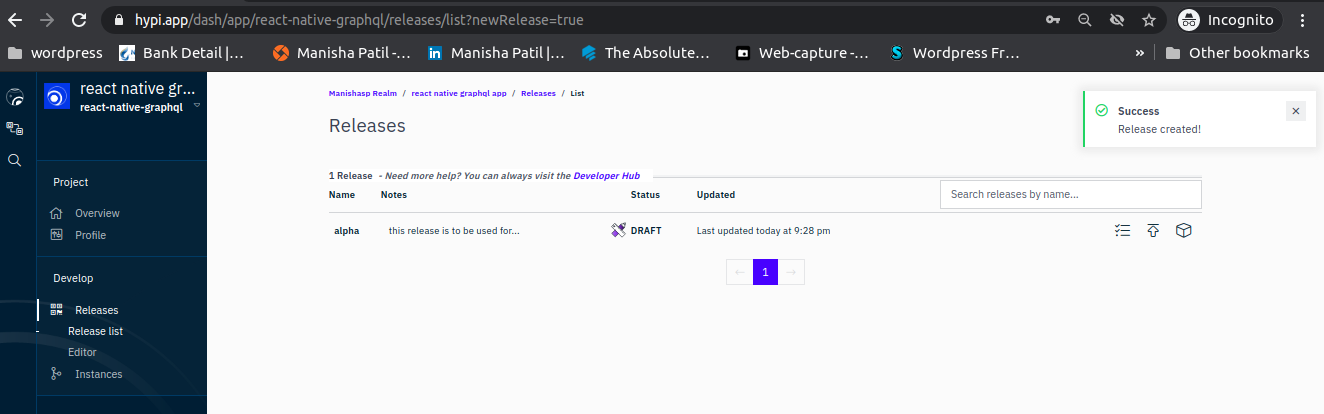
Fill out all the details and click on Create button. Upon release creation it takes to below screen:
3.Creating a schema
A schema in Hypi is a GraphQL data model which represents the model you want for your app. In Hypi, everything about your app’s API is controlled with the schema.
Each created release have a demo data model, so you can get a quick start, click on the “Editor” link to get access to the editor. You’ll notice that the releases are to the left of the editor with a folder named after each created release.
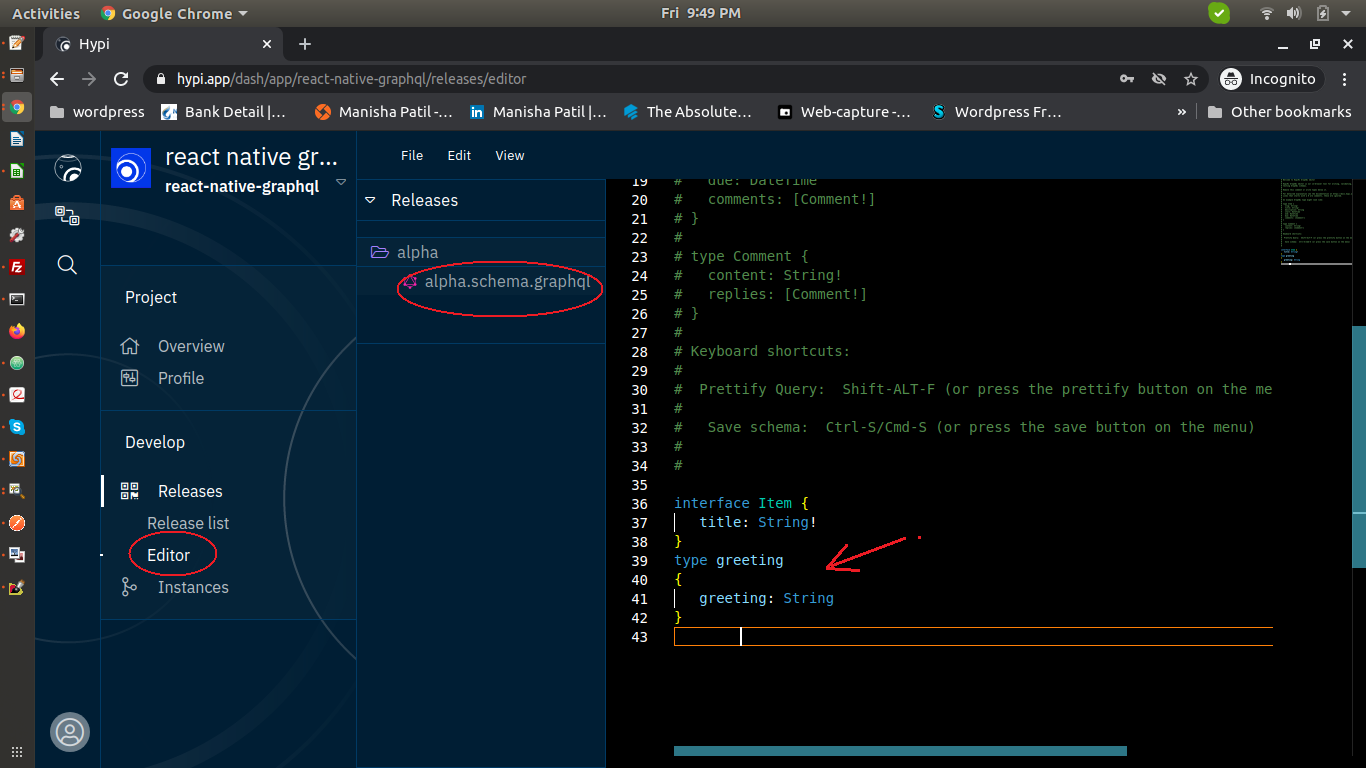
The schema editor allows you to enter GraphQL definitions that will serve as the basis for the Apps data model and APIs. Here we have added a new type:
type greeting{ greeting: String }
Currently the editor only have two modes Save and Beautify, simply click “save” to save your changes, the editor doesn’t save automatically. Click, “Beautify” to clean up your code once done.
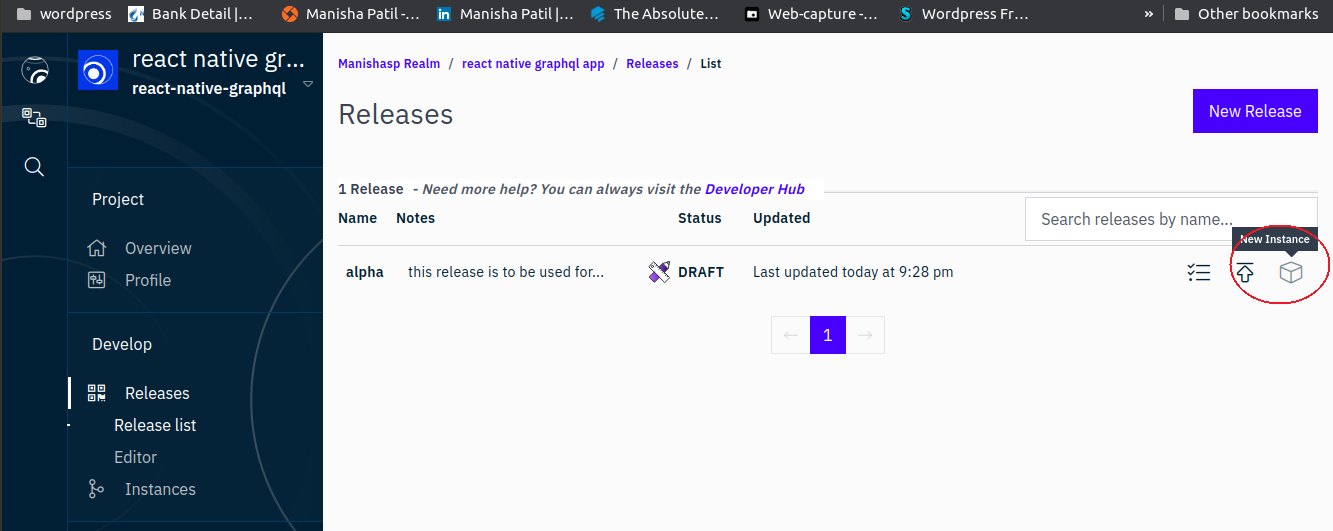
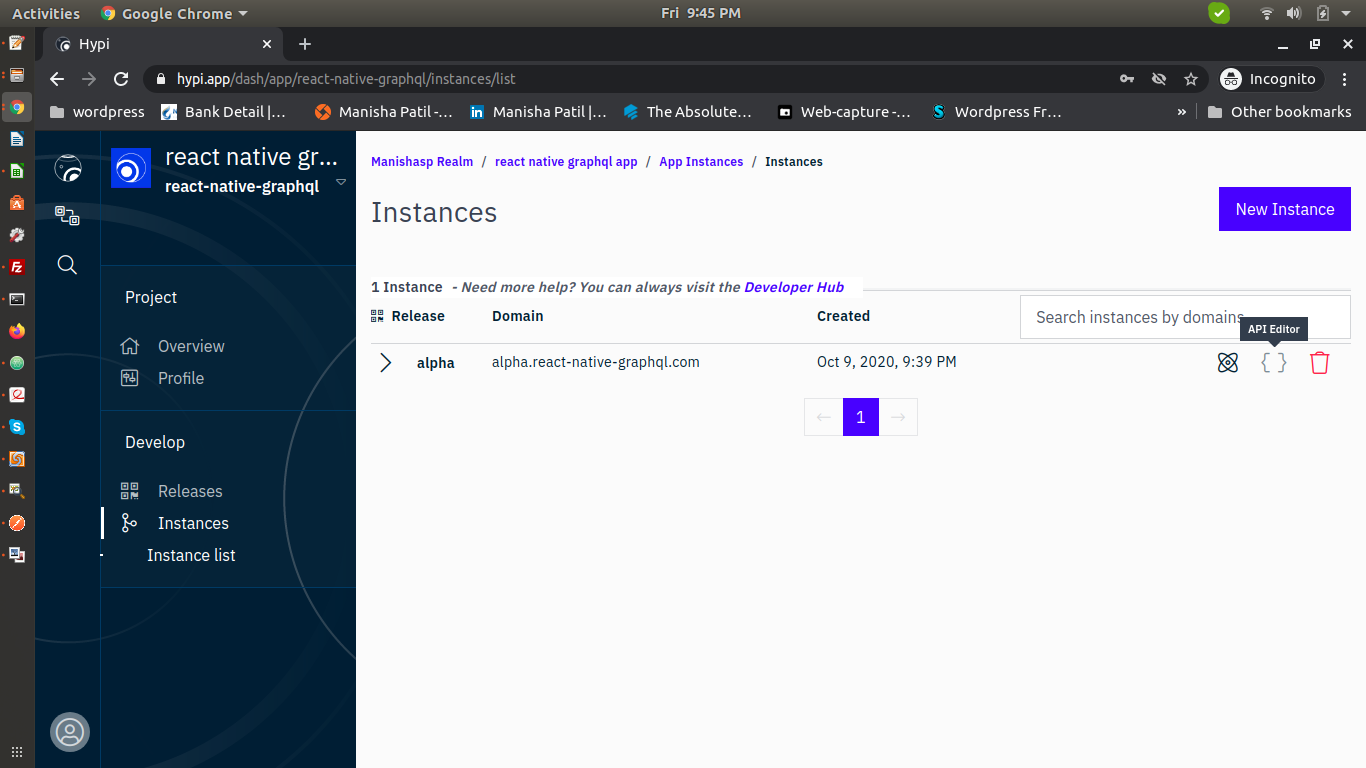
4.Creating an Instance for the release
An Instance represents an addressable version of an App, by creating an Instance, you can assign a custom domain or an auto-generated Hypi domain.
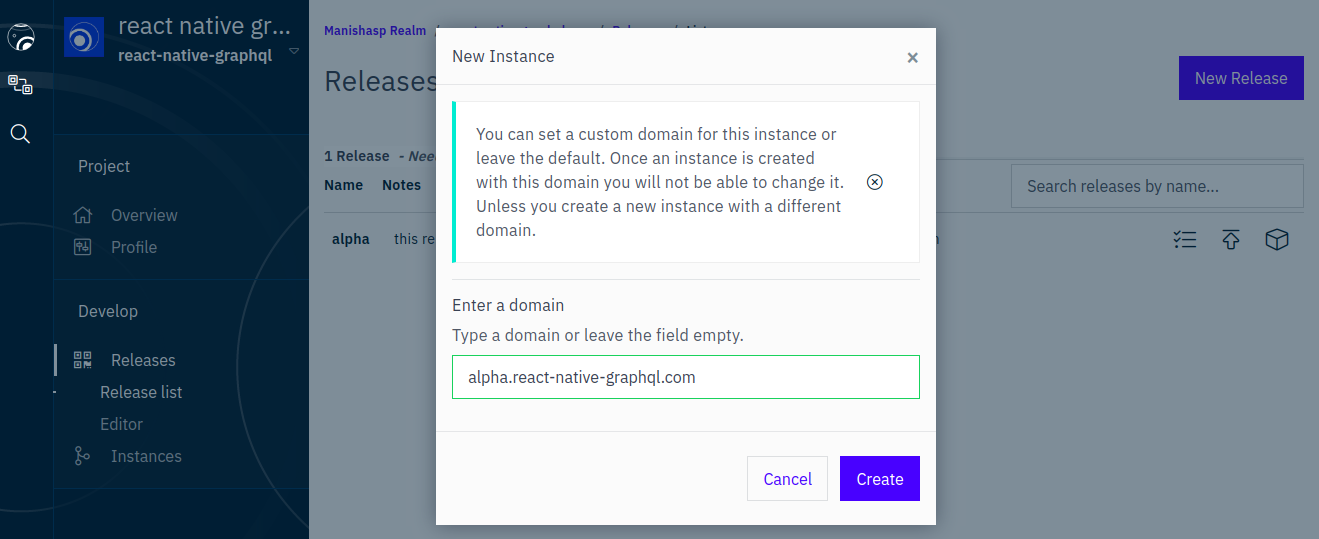
Click on New Instance as shown below to create a new instance.
Provide a domain name, in our case we entered as : alpha.react-native-graphql.com, click on create
Next, the domain gets created and navigates to below screen:
Two instances cannot share the same domain but multiple instances can be created with custom domains.
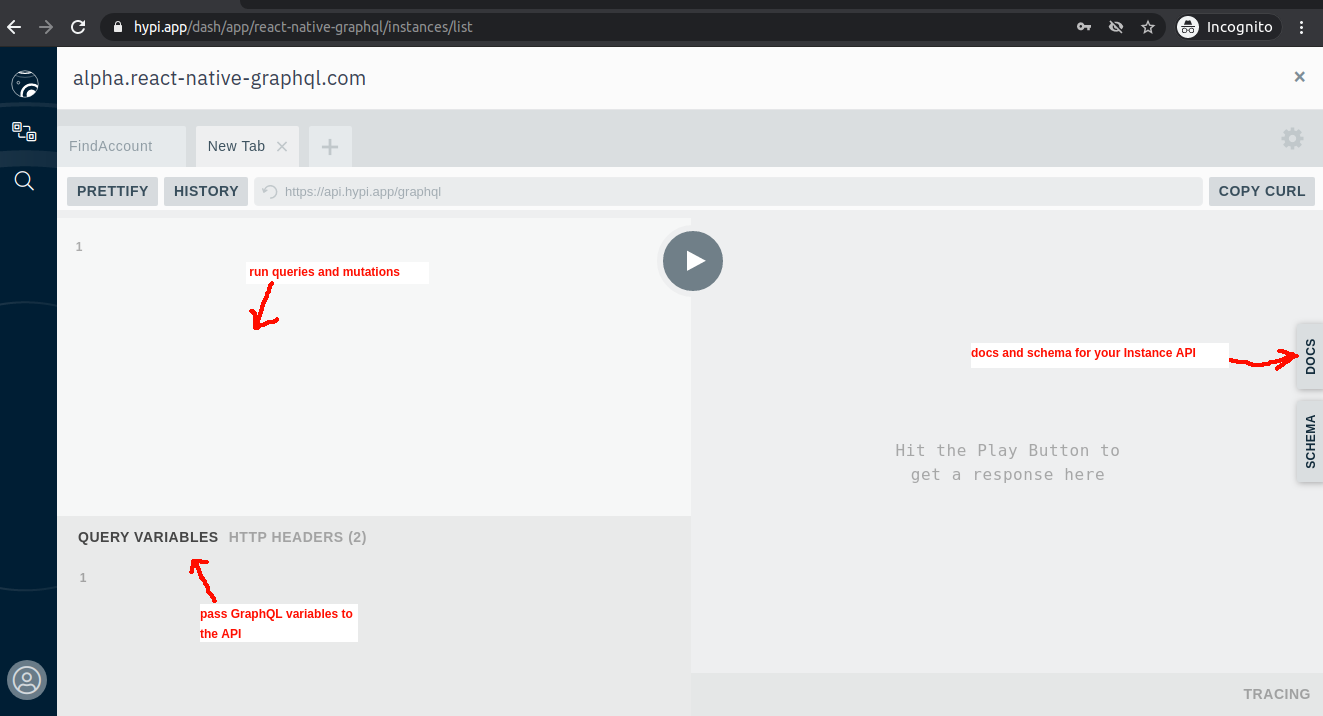
Once an Instance is created, the domain is then used as the hypi-domain header that can be provided when working with an app’s API.
{
  "url": "https://api.hypi.app/graphql/",
  "headers": {
    "Authorization": "Auth Token here. Generate one by login a user into their account or the current one be copied from the Developer Hub",
    "hypi-domain": "alpha.react-native-graphql.com"
  }
}
API editor as seen in the above image, is an in-browser IDE for exploring your Instance GraphQL API. You can run queries and mutations against API or quickly see the docs and schema for your Instance API.
5.Inserting the records
The first thing you may want to do once you create an instance is add some data. In Hypi there is one function that is used for both inserting new data and updating existing ones called upsert. Checkout more details about this function here.
For our example we have executed the below query in the API editor.
mutation Upsert($values: HypiUpsertInputUnion!) {
   upsert(values: $values) {
     id
   }
}
Below image shows the actual execution:
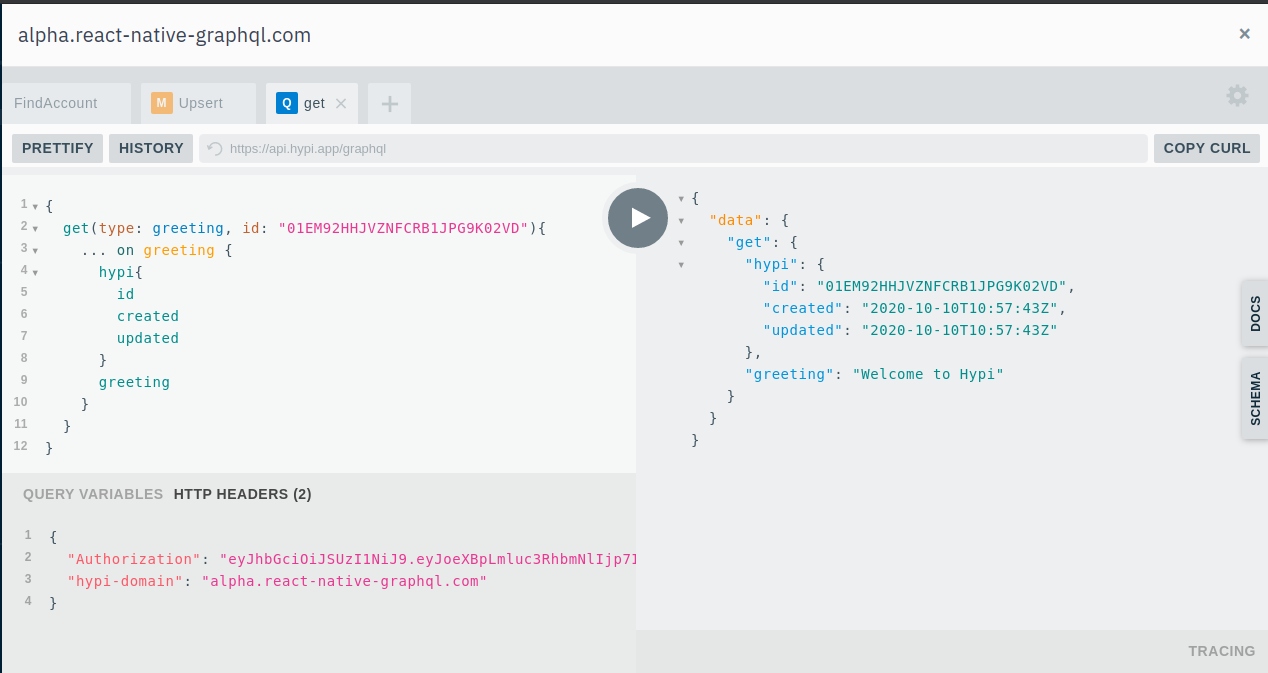
Here we see that a recod with id:01EM92HHJVZNFCRB1JPG9K02VD is created.
We will fetch this record in our react-native app and display on the home screen. Let’s see this in next steps.
6.Creating & configuring a new React Native app
Here we assume that the reader has basic knowledge of React Native apps. Here we are going to use Expo to create new React Native project
Expo is a free and open source toolchain built around React Native to help you to build native iOS and Android projects using JavaScript and React.
Pre-requisites to build the app:
- Install latest Node.js
- Install latest version of Expo CLI
Our project structure is as below:
react-native-helloworld-hypi
    |-assets
    |-App.js
    |-app.json
    |-babel.config.js
    |-package.json
Dependencies in package.json are as below:
{
  "main": "node_modules/expo/AppEntry.js",
  "scripts": {
    "start": "expo start",
    "android": "expo start --android",
    "ios": "expo start --ios",
    "eject": "expo eject"
  },
  "dependencies": {
    "expo": "^39.0.3",
    "react": "16.13.1",
    "react-native": "https://github.com/expo/react-native/archive/sdk-37.0.0.tar.gz"
  },
  "devDependencies": {
    "babel-preset-expo": "^8.3.0"
  },
  "private": true
}
Our App.js is:
import React, { Component } from 'react';
import { StyleSheet, Text, View, Button } from 'react-native';

export default class App extends React.Component {
  constructor(props){
    super(props);
    this.state = {
      name: 'Hey There!',
    }
  }

  onClick = () => {
    loadGreeting().then(g => this.setState({name:g+" :-)"}))
  };

  render() {
    return (
      <View style={styles.container}>
        <Text style={styles.nameText}>{this.state.name}</Text>
        <Button color='#4169E1' onPress={() => {this.onClick()}} title='Click me'> </Button>
      </View>
    );
  }
}

const styles = StyleSheet.create({
  container: {
    flex: 1,
    backgroundColor: '#fff',
    alignItems: 'center',
    justifyContent: 'center',
  },
  nameText: {
    fontSize: 38,
    padding: 15,
  }
});
async function loadGreeting() {
  var graphql = JSON.stringify({
  query: "{  get(type: greeting, id: "01EM92HHJVZNFCRB1JPG9K02VD"){    ... on greeting {      hypi{        id        created        updated      }      greeting    }  }}",
  variables: {}
})
   const response =  await fetch('https://api.hypi.app/graphql', {
      method:'POST',
      headers:{'content-type':'application/json','Authorization': 'eyJhbGciOiJSUzI1NiJ9.eyJoeXBpLmluc3RhbmNlIjp7InJlYWxtIjoibWFuaXNoYXNwIiwibmFtZSI6InN0b3JlIiwicmVsZWFzZSI6ImxhdGVzdCJ9LCJoeXBpLmxvZ2luIjp0cnVlLCJoeXBpLnB1cnBvc2UiOiJsb2dpbiIsImh5cGkudXNlcm5hbWUiOiJtYW5pc2hhQHRla2J1ZHMuY29tIiwiYXVkIjoibWFuaXNoYXNwIiwiaWF0IjoxNjAyMjQ4MTY5LCJleHAiOjE2MDQ4NDAxNjksInN1YiI6IjAxRU02UFhHTUEwR1ZRN1Q5TlpQQVlKOFozIiwibmJmIjoxNjAyMjQ4MTY5fQ.H7AykAvhLxJtR7YgUyq7gYfK5sQRkRRXdicaVJnZ6_4i0LdMBFCsdugHCDHE7YvFtAhbLj3Q4_LuxZFvmR0MGtiEHx3uCefY3GCYYiHeBDiObcxp8hS_zJgNf6NN1eIf8ZGu1hZ8ulRegO5_2xb3yRp6FJiPgCM7pLJKCcTVsQZqdhYPPeF3I6B4A2NV0ZxzUpgomYio_jnhqMH0V4-3HO6zYSgP2Q29DNVYwdYG_45ggTYcCrOTDGHXlD_-hmeo-QxSzob1vWOl263bzdDf1wUjDBF0EMyGWg1OZgDI3gKkT7UthMgwmOJWG_k7DkIINz6Ned-cpBL_-t0lYbVTQA','hypi-domain': 'alpha.react-native-graphql.com'},
      body:graphql
   })
   const rsponseBody =  await response.json();
   return rsponseBody.data.get.greeting;

}
7.API Setup on React Native app
As seen in the App.js, we have a function loadGreeting(), which makes a call to our Hypi API. Here we pass the API url as : https://api.hypi.app/graphql .
In the header we need to pass two params:
- Authorization
- hypi-domain
Both these can be obtained from here:
8.App Execution
Now that our app is ready, let’s execute this. Go to command line and execute below command:
npm start
A browser opens at: http://localhost:19002/ . Now if you have expo app installed on your android phone, scan the QR code that appears on the browser:

You will see the below screen on expo app of your mobile:

Click on button “CLICK ME”, below screen shows up. Here the data is fetched from Hypi API.

This is how you read from Hypi in React Native. Play around with the app, by adding new entities.
Conclusion
Hypi provides the low-code backend-as-a-service that lets you build serverless cloud applications and API services.
Here we’ve showcased the most basic fetch feature in this React Native Hypi tutorial. In the next series, we’ll cover more advanced features.


