Installing a Python Based Machine Learning Environment in Windows 10
An easy guide to get started with machine learning
Purpose: To install a Python based environment for machine learning.
The following set of instructions were compiled from across the web and written for a Windows 10 OS. Last tested on 02/09/2019.
Overview
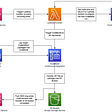
When I first got into machine learning it took me a few hours to figure how to properly set my Python environment. Out of frustration, I decided to write this post to help anyone going through the process. We will start by installing Anaconda Navigator which will allow us to create independent environments, this will come really handy. Additionally, with Anaconda we can easily install compatible Python modules with very simple commands. Finally, we can use Anaconda to get Spyder — a scientific Python development environment. If you follow the step-by-step procedure shown below, you will have installed Tensorflow, Keras, and Scikit-learn in no time.
Getting Anaconda
In order to start building your machine learning (ML) models with Python, we will start by installing Anaconda Navigator. Anaconda provides an efficient and easy way to install Python modules on your machine. So let’s get started.
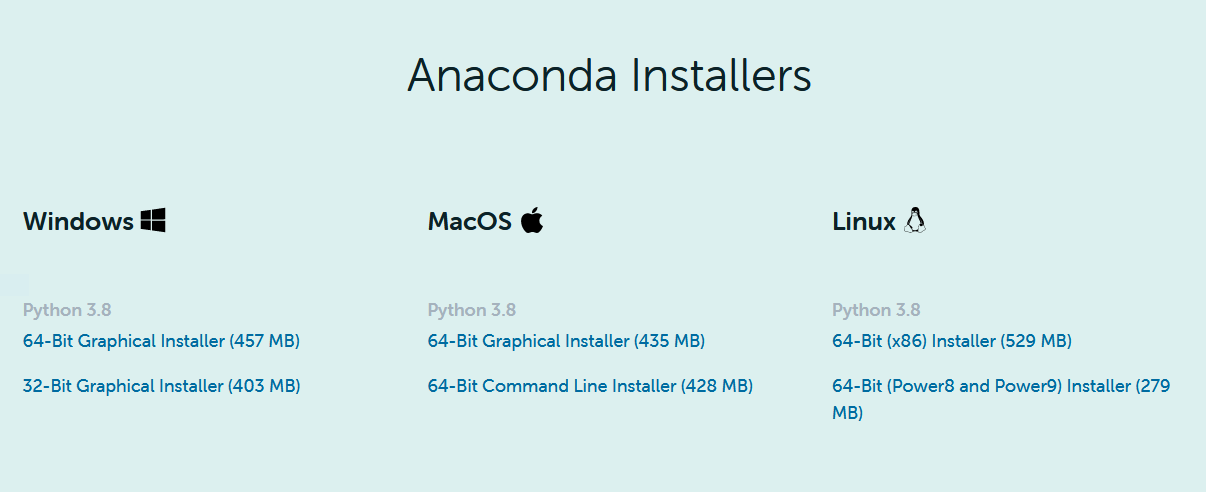
- Download and install the latest version of Anaconda Navigator for your operating system.
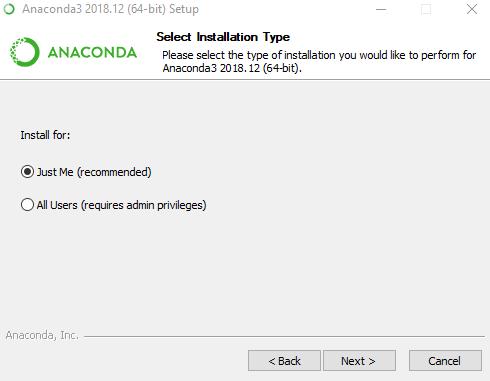
2. Proceed with the installation wizard but skip the step where you need to download and install VS, we will do this later. Additionally, make sure to install Anaconda Navigator for a single user — installing Anaconda for All Users might lead to problems. For example, you won’t be able to install any modules because Anaconda won’t have the necessary privileges.

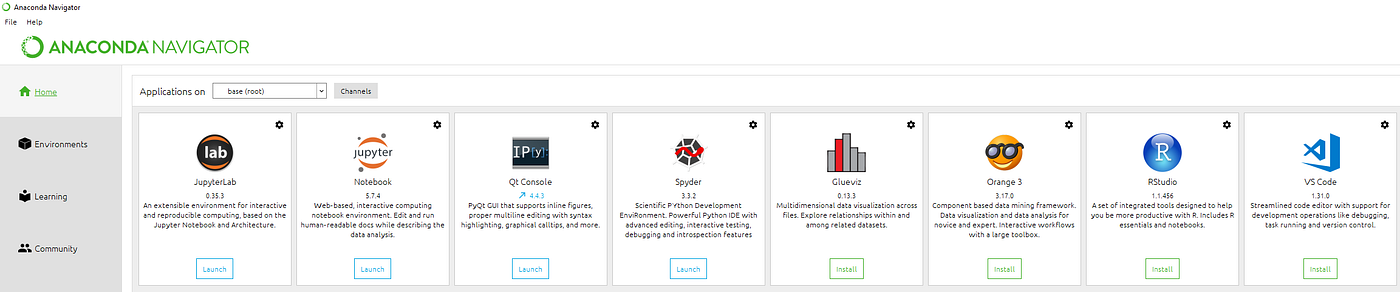
3. Launch Anaconda Navigator and select the Home Tab, it should be selected by default. Find the VS Code Panel and click on the Install button. This will take a minute or two.
Intalling Keras and Tensorflow
Now that we have installed Anaconda, let’s get Keras and Tensorflow in our machine.
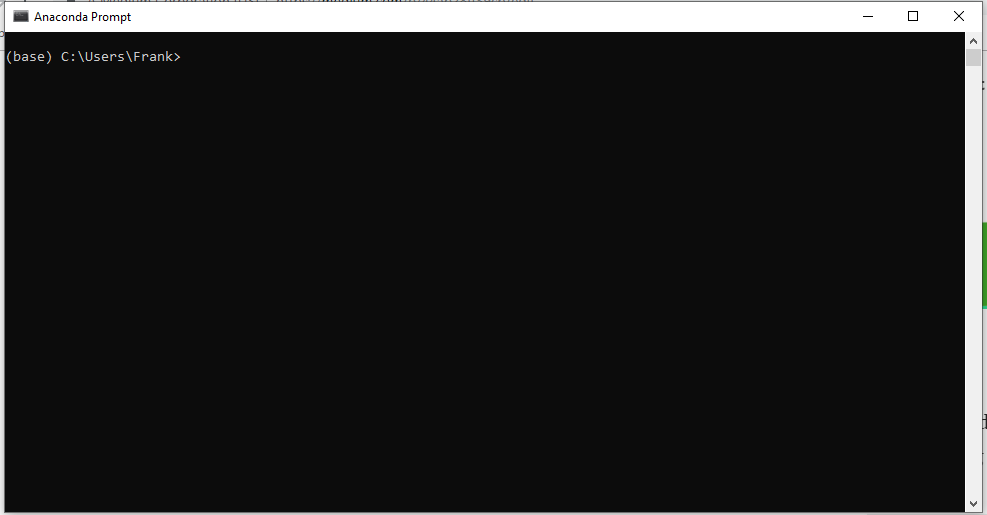
4. Close Anaconda Navigator and launch Anaconda Prompt. Launch Anaconda prompt by searching for it in the windows search bar. The following terminal should open. Notice that this will open on the base Anaconda environment.
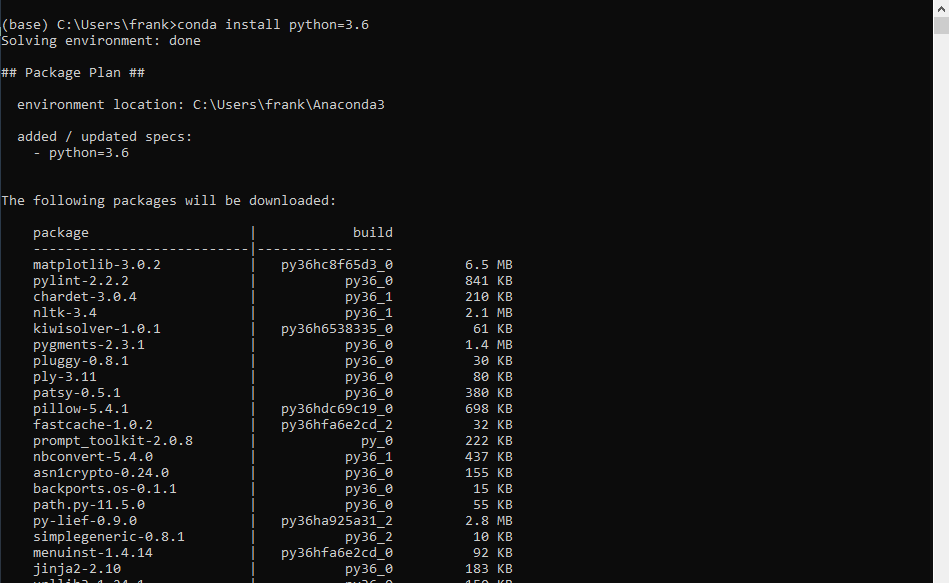
5. Downgrade Python to a Keras & Tensorflow compatible version. Anaconda will start to look for all the compatible modules for Python 3.6. This might take a few minutes. To downgrade to Python 3.6 use the following command:
conda install python=3.6
6. Create a new conda environment where we will install our modules to built our models using the GPU. To do so, execute the following command:
conda create --name PythonGPU
Note: Ensure that you have a NVIDIA graphics card. If you don’t, install the CPU version of Keras.
If you want to use your CPU instead, execute the following command:
conda create --name PythonCPU
Follow the instructions displayed on the terminal. Conda environments give the user the liberty to install very specific modules that are independent habitats. Personally, I created two environments. One where I can built my models using the CPU and the other where I can built my models using the GPU. For more information about conda environments, I suggest you take a look at the official documentation.
7. To activate the conda environment that was just created use:
activate PythonGPU or activate PythonCPU
To deactivate the environment use:
conda deactivate
Do not deactivate the environment yet, we are about to install all the good stuff.
8. To install Keras & Tensorflow GPU versions, the modules that are necessary to create our models with our GPU, execute the following command:
conda install -c anaconda keras-gpu
If you want to use your CPU to built models, execute the following command instead:
conda install -c anaconda keras
A lot of computer stuff will start happening. Once the madness stops, we can move on. Don’t close anything yet.
Getting Spyder and other Python Packages for Machine Learning / Deep Learning
Now you might want some piece of software to write and execute your Python scrips. You can always use Vim to write and edit your Python scrips and have another terminal open to execute them. However, you will be missing out on all the cool features Spyder haves to offer.
9. Install Spyder.
conda install spyder
10. Install Pandas. Pandas is a library that is extremely powerful and allows you to easily read, manipulate, and visualize data.
conda install -c anaconda pandas
If you want to read Excel files with Pandas, execute the following commands:
conda install -c anaconda xlrd
conda install -c anaconda xlwt
11. Install the Seaborn library. Seaborn is an amazing library that allows you to easily visualize your data.
conda install -c anaconda seaborn
12. To install scikit-learn.
conda install -c anaconda scikit-learn
13. Install Pillow to handle images
conda install pillow
Adding Missing Modules
By now you should feel comfortable installing modules using the conda command. If you need a specific module, simply Google something along the following lines:
Anaconda LibraryNameYouWant Install
If you encounter any problems search the web. Is most likely that you’re not the first person to encounter a given error.
Launching Spyder and Checking That All Modules Were Installed Correctly
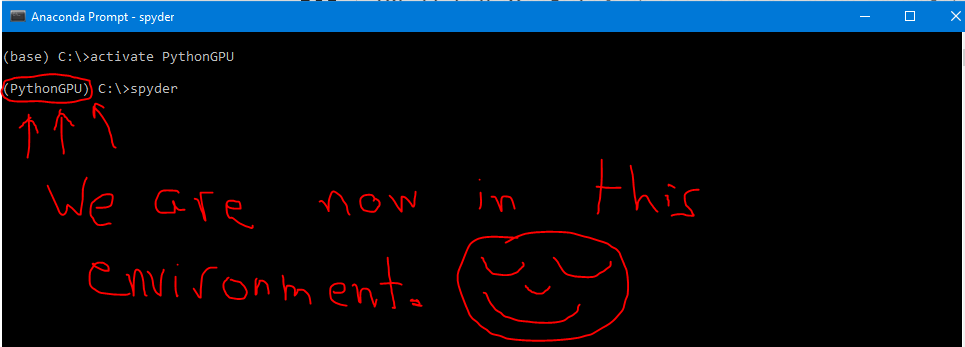
To launch Spyder, first activate the conda environment you want (PythonCPU or PythonGPU) and execute the following command:
spyder
To ensure everything was installed correctly, execute the following lines of code on the python console:
import numpy as np # For numerical fast numerical calculations
import matplotlib.pyplot as plt # For making plots
import pandas as pd # Deals with data
import seaborn as sns # Makes beautiful plots
from sklearn.preprocessing import StandardScaler # Testing sklearn
import tensorflow # Imports tensorflow
import keras # Imports keras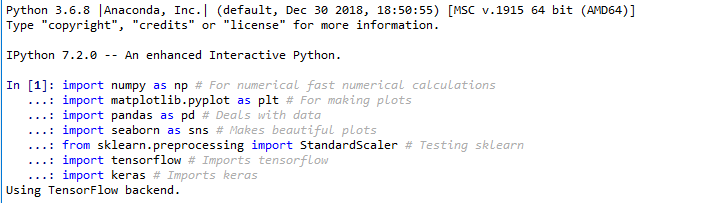
If you see no ModuleImport errors, you’re now ready to start building machine learning based models using Keras, Tensorflow, and Scikit-Learn.
You can find me in LinkedIn or visit my personal blog.